
On this page
- What you will build
- How CSS pointer events work
- 1. Create three HTML buttons
- 2. Add the pointer-events rule
- 3. Keep keyboard focus visible
- 4. Style the disabled button
- 5. Display a message with JavaScript
- Test CSS pointer events with a mouse and keyboard
- When should you use each approach?
- A small exercise
- Download the complete project
- What to remember
CSS Pointer Events: None vs Disabled — A Beginner’s Guide
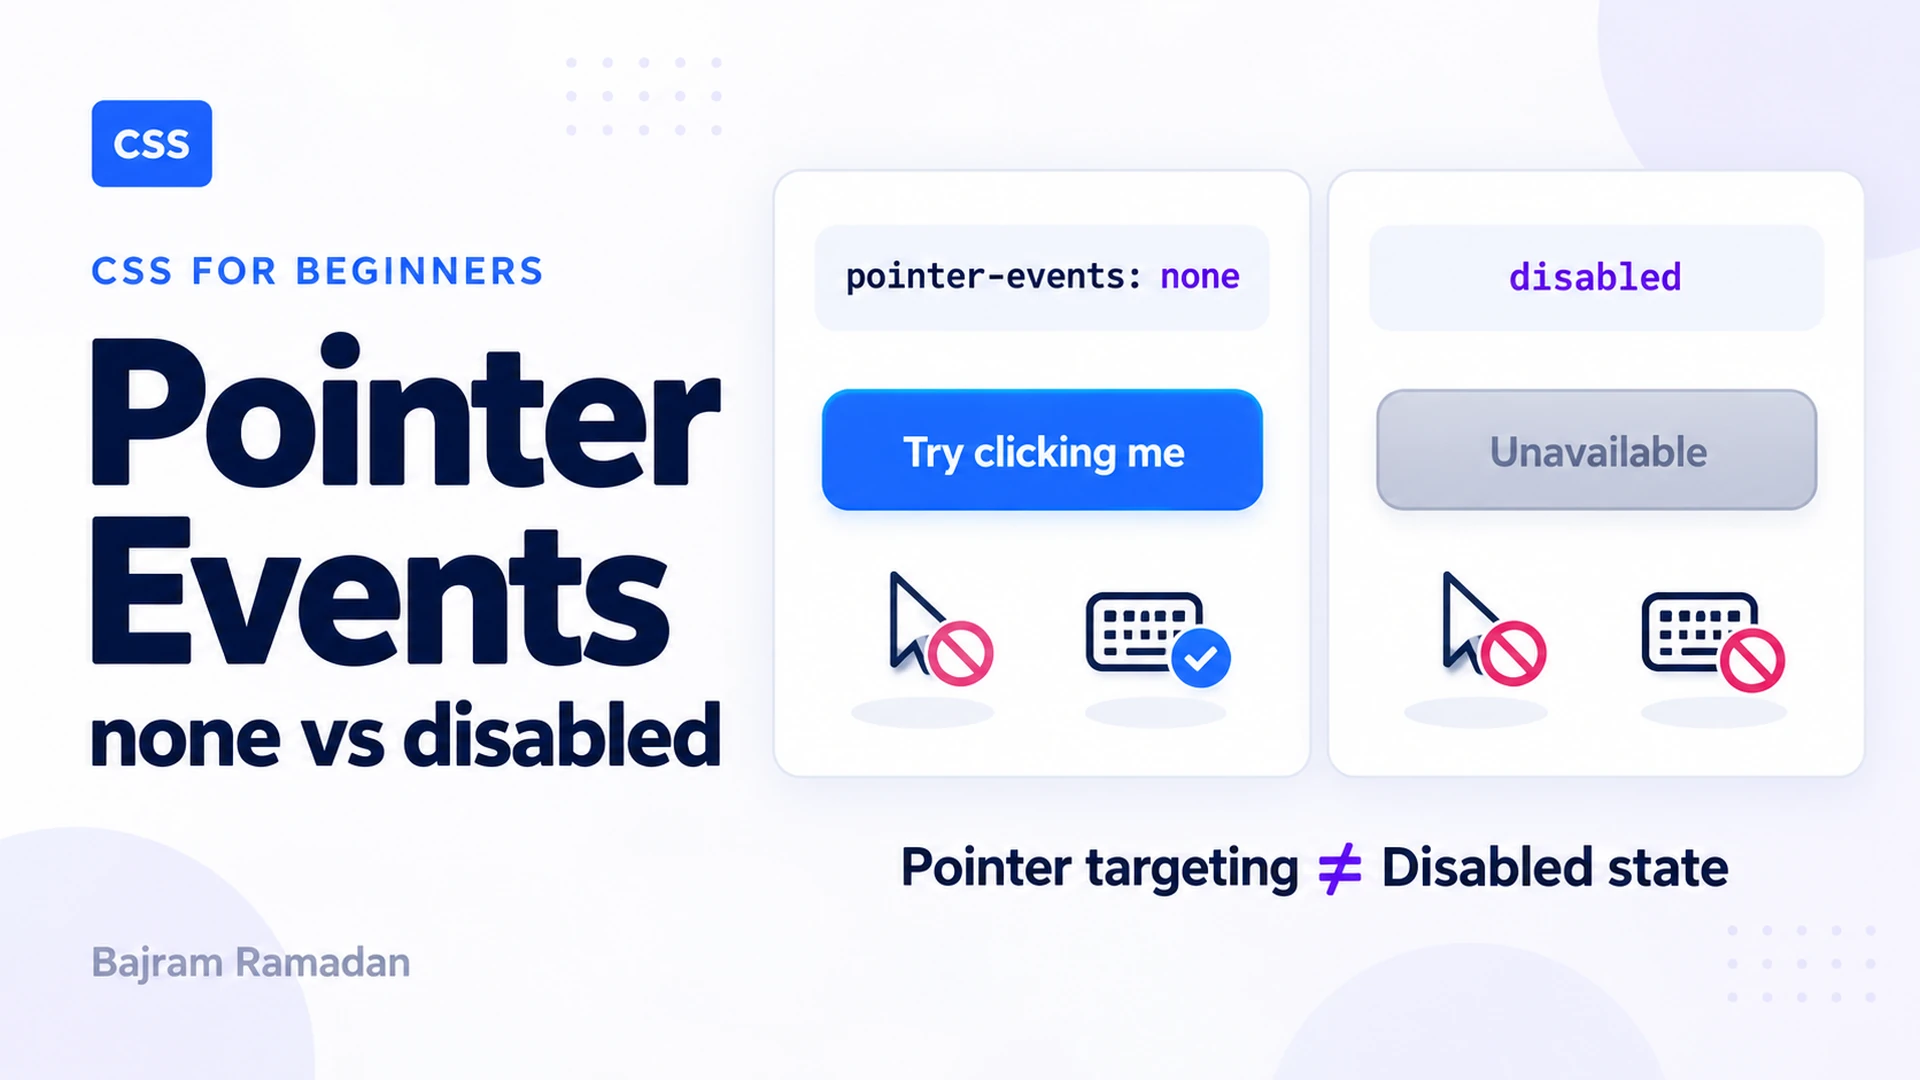
CSS pointer events can change how a button responds to a mouse or another pointing device. However, adding pointer-events: none does not make that button fully disabled. It can still receive keyboard focus and be activated from the keyboard.
This is easy to miss when you only test by clicking. In this beginner tutorial, we will compare a normal button, a button with pointer-events: none and a button with the HTML disabled attribute.
Try the CSS Pointer Events demo in Playground.
What you will build
The project contains three cards and a “Last action” message. Each card shows one button, a short code label and a description of its expected behaviour.
You only need HTML, CSS and a few lines of JavaScript. There are no frameworks, packages or build tools to install.
The downloadable project has three runtime files:
css-pointer-events-demo/
  index.html
  style.css
  script.js
The ZIP also includes a README and an MIT license. The shared header belongs to the portfolio theme’s Playground viewer, so the demo itself has no header.
[INSERT SCREENSHOT HERE: Show the three cards and the Last action area. Suggested alt: “Three buttons demonstrating normal interaction, CSS pointer events none and the HTML disabled attribute.” Remove this instruction after inserting the image.]
How CSS pointer events work
The pointer-events property controls whether an element can be a target for pointer interaction. With none, a pointer can target what is behind the element instead. Keyboard focus is a separate concern.
In our example, the second button sits inside a plain card. Clicking over that button targets the card behind it, which has no action handler. Read the MDN pointer-events reference for further details.
1. Create three HTML buttons
Start with a normal button:
<button id="normal-button" type="button">Try clicking me</button>Next, add a button with a CSS class:
<button id="pointer-button" class="no-pointer" type="button">
  Try clicking me
</button>
Finally, use the native disabled attribute on a third button:
<button id="disabled-button" type="button" disabled>Unavailable</button>The IDs let JavaScript find specific elements. The no-pointer class lets CSS select the second button. Meanwhile, type="button" makes the intended button behaviour explicit if you later place the example inside a form.
Add a paragraph for the messages:
<p id="message" role="status">
  Activate a button to see its message here.
</p>
The paragraph is already in the page before a message changes. Its role="status" lets assistive technology announce updates without moving the visitor’s focus.
2. Add the pointer-events rule
In style.css, write:
.no-pointer {
  pointer-events: none;
}
The dot before no-pointer selects a class. This rule applies only to the second button.
If you want one rule to target both a class and an ID, separate the selectors with a comma:
.my-class,
#my-id {
  pointer-events: none;
}
These are alternative selector examples, not additional rules needed by our project. There is no CSS keyword or between selectors.
3. Keep keyboard focus visible
The two active buttons should have a clear focus outline:
button:focus-visible {
  outline: 3px solid #7c36b8;
  outline-offset: 5px;
}
This makes the keyboard exercise easier to follow. When you press Tab, look for the outline before pressing Enter or Space.
The second button deliberately looks like the normal button. Its appearance helps demonstrate that pointer behaviour and disabled state are separate decisions.
4. Style the disabled button
Use the :disabled selector to give the third button a different appearance:
button:disabled {
  background: #dfe2eb;
  color: #586078;
  cursor: not-allowed;
}
These styles only change how it looks. The HTML disabled attribute supplies the disabled behaviour.
On a supported control such as <button>, disabled prevents normal activation and removes it from ordinary keyboard focus navigation. Writing disabled on a generic <div> or an <a> does not give it the same native behaviour. See the MDN disabled attribute reference.
5. Display a message with JavaScript
The following is the complete script.js used in the downloadable demo:
// Find the two active buttons and the paragraph used for messages.
const normalButton = document.getElementById("normal-button");
const pointerButton = document.getElementById("pointer-button");
const message = document.getElementById("message");

// A normal button can be activated with a pointer or a keyboard.
normalButton.addEventListener("click", function () {
  message.textContent = "Normal button activated. It works with a pointer and a keyboard.";
});

// CSS prevents pointer targeting, but keyboard activation still fires a click event.
pointerButton.addEventListener("click", function () {
  message.textContent = "The pointer-events button activated. CSS does not disable keyboard activation.";
});

// No custom key handlers are needed: HTML buttons already support keyboard activation.
// The third button uses the native disabled attribute, so we do not attach a handler.
First, getElementById() finds the buttons and message paragraph. Each listener then changes textContent when its button is activated.
Notice that both listeners use the event name click. Native button activation from a keyboard also produces a click event, so we do not need a separate keyboard handler for this example.
There is no listener on the disabled button. We are comparing normal browser behaviour, not trying to bypass it.
Load the script with defer so the HTML elements are available when it runs:
<script src="script.js" defer></script>Include the stylesheet in the document’s <head> too:
<link rel="stylesheet" href="style.css">Test CSS pointer events with a mouse and keyboard
Open the interactive Playground demo, then try these steps:
- Click the normal button. The “Last action” message changes.
- Click the second button. Its handler does not run from that pointer interaction.
- Click a blank area inside the demo, then use Tab to reach the buttons.
- Focus the second button and press Enter or Space. Its message now changes.
- Continue with Tab. The disabled button is skipped during ordinary keyboard navigation.
The Playground header is outside the demo’s iframe. Its links are also part of the surrounding page’s Tab sequence. If needed, choose “Open demo separately” to try the project on its own.
Browser and system settings can affect focus navigation. Some macOS configurations require enabling keyboard navigation or using Option+Tab.
Here is the comparison for these particular buttons:
| Button | Pointer activation | Keyboard activation | Ordinary Tab focus |
|---|---|---|---|
| Normal button | Yes | Yes | Yes |
pointer-events: none |
Not directly targeted | Yes | Yes |
HTML disabled |
No | No | Skipped |
When should you use each approach?
Use pointer-events: none when pointer targeting is the specific behaviour you want to change. For example, a decorative overlay may need to let pointer interaction reach content underneath it.
Use native disabled when a supported control should actually be unavailable. Also explain why an important action is unavailable, rather than relying only on a grey colour.
Neither approach is a security boundary. A server still needs to validate actions and permissions independently of how a button is presented.
A small exercise
Open style.css and change this line:
pointer-events: none;to:
pointer-events: auto;Save the file and reload the demo. Now the second button can be targeted by the pointer again. Try its keyboard interaction too: it remains available in both versions.
Then restore none and explain the difference in your own words. This is a useful way to check that you understand what changed.
Download the complete project
Find CSS Pointer Events: None vs Disabled in Playground.
Click Download ZIP, extract the files and open index.html in your browser. Keep index.html, style.css and script.js together. The ZIP contains the complete layout shown in the demo, including the cards and responsive styles omitted from the focused snippets above.
For another small beginner exercise, explore Basic JavaScript Device Detection. To learn more about choosing meaningful HTML elements, read my practical guide to semantic HTML.
What to remember
CSS pointer events and the HTML disabled state solve different problems. A button that ignores a mouse click may still work from a keyboard.
Test both interaction methods, use native controls for their intended purpose and keep the difference clear in your code.
ARTICLE FEEDBACK
Was this article helpful?
Your feedback helps me improve future tutorials.
Saving your rating stores a browser identifier for one year so you can update or delete your vote. Feedback is anonymous; please do not include personal information.
These scores reflect reader opinions, not an objective readability or accuracy test.
Questions & thoughts.
Have a question or an example to share? Start the conversation.